Photographing birds is fun and it’s a great way to create wonderful memories of special birds and birding trips. It’s also a good way to learn more about birds. I’m not an expert, but I would like to share what I’ve learned. I just use a “point-and-shoot” camera, but these basics also apply to DSLR cameras.
I got my current camera (a Panasonic Lumix DMC-FZ150) about two years ago and I quickly learned that I rarely got good photographs with auto mode. I switched to program mode so that I could set the focus to a single area. This is probably the single most important thing to do – put your camera in any mode other than auto and use a single focus area. That’s all I did until recently and I got nice photographs of easy birds under good conditions.

American Woodcock. Program mode. Camera stabilized on the boardwalk railing. Image cropped, but no other editing.
Recently, I’ve become interested in improving my skills, so I had photography lessons with Tom Dunkerton at Merritt Island NWR on my last trip to Florida. Tom set me in the right direction, made it fun and easy, and gave me confidence. I also found some great online tutorials on bird photography and bought a book. I’ll give links to these resources at the end of this post.

Green Heron. My favorite photo taken the day after my lessons with Tom Dunkerton.
The first thing to work on is getting sharp, well-exposed images. As mentioned above, use a single focus area. On most cameras you can control the position of the focus area (it doesn’t have to be in the center of the image) and the size of the area. Focus on the bird’s eye. If the eye is in focus, the photo will generally be pleasing. Aperture mode is usually recommended for photographing birds. A wide aperture (low number) will increase the shutter speed, helping prevent blur caused by movement of the subject. It will also help to get a sharp image of the bird, but keep the background softly out of focus. Unless you are trying to create a shot showing bird habitat, a sharply focused background is distracting.

Red-bellied Woodpecker in my backyard. The light in the bird’s eye makes this photo work.
It is also important to hold the camera as still as possible. Experts recommend using the electronic viewfinder rather than the LCD screen. That allows you to use your body to stabilize the camera. I’ve never been able to do that, so I put the camera strap around my neck and hold the camera away from my body so that the strap is tight. I hold my left hand under the camera to add additional stability and press the shutter with my right hand. Even better than hand-holding the camera is using a tripod, monopod, or some other stationary object to support the camera. Experiment – see what works for you.
Three things affect exposure – aperture, shutter speed, and ISO. A good basic ISO setting is 400. However, if you are shooting in low light, you may want to increase the ISO. When using aperture mode, the camera will automatically set the shutter speed. This works fine for most birds with good lighting conditions. But, white birds and very dark birds are more challenging. You may also need to make some adjustments if the light is not ideal. The easiest way to make adjustments is to use exposure compensation. To do this effectively, set your camera to display a histogram and learn to read it. It’s actually very easy and provides instant feedback on your exposure. It simply displays the tones in the image, usually from dark on the left to the lightest tones on the right. The goal is to keep the graph within the scale, as evenly distributed from left to right as possible, but not “hitting the wall” on either end. If the graph goes off the left end, the photo will be underexposed and details lost in the shadows. If it goes off the right end, some areas of the photo will be pure white and no post-processing can recover the blown highlights. If the graph is too far to the left, increase the exposure compensation. If it’s too far to the right, decrease the exposure compensation.
There is much more to learn about photography, but these basics will go a long way towards helping you get some nice photos that will add to your enjoyment of birds.
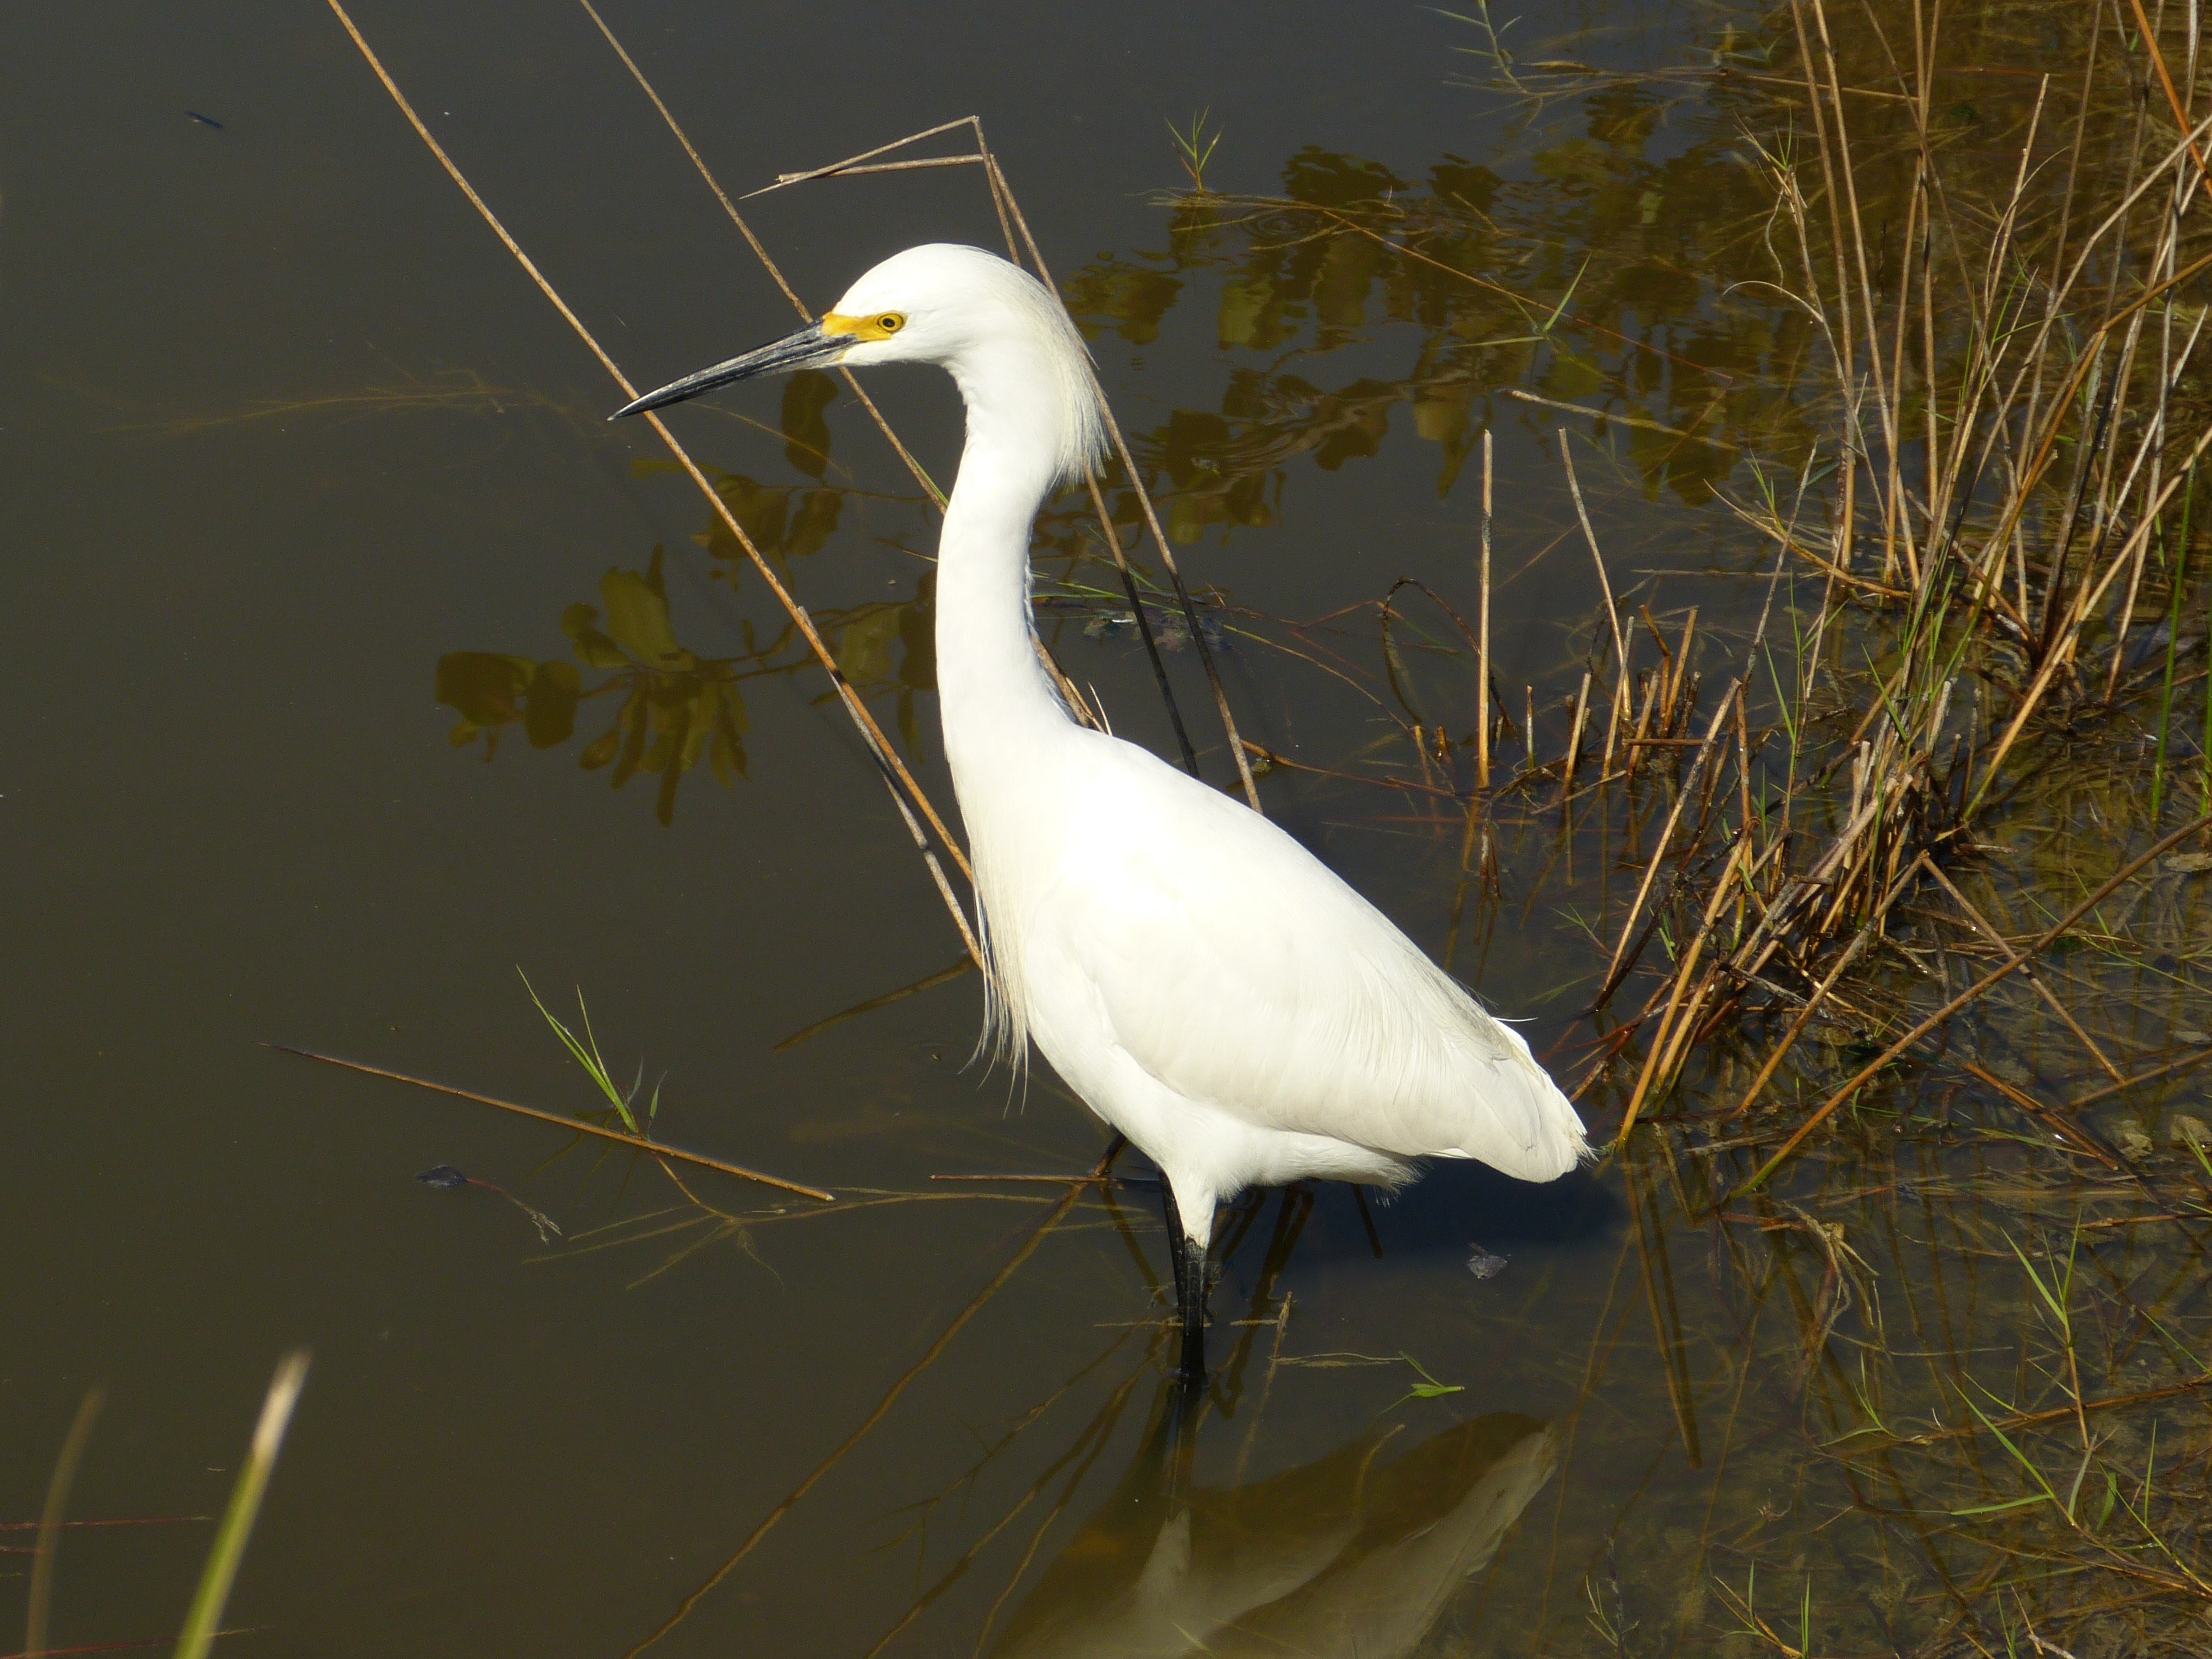
This Snowy Egret was a white bird with a dark background. An exposure compensation of -1 kept the details in the white feathers.
Here are a few more miscellaneous tips that I’ve recently learned.
- Study your bad photos to determine what went wrong. Also, study your good photos to see what went right. Use the EXIF data embedded in each photo to see the settings you used and how they affected the image.
- Try turning off “image stabilization” in good light. I was amazed, but my images were sharper after I turned this setting to “off.”
- Use burst mode. Any camera movement caused by pressing the shutter won’t be evident in the second and subsequent photos. It may also help you get the bird in a more pleasing position if it moves.
- Take lots of photos. It’s not film. It’s free to shoot photos with a digital camera.
- Use photo-editing software. Sure, you want to capture the best image that you can, but don’t be afraid to improve it with a little editing.

Pine Warbler (female). Even a simple image can be pleasing. This photo works because the background is out of focus.
A few resources for bird photography:
- The user manual for your camera.
- Bird Photography Tutorials from Mike Atkinson.
- Many excellent books on digital photography are available. I just bought The Beginner’s Photography Guide ($15.18 from Amazon) and I’m finding it to be extremely helpful.
- Ask for help. We have several skilled photographers in Forsyth County who are willing to answer questions, offer suggestions, and provide additional help.
Below is an example of learning more about birds through photography. I photographed this male Common Merganser in California a couple of years ago. When I looked at the photo, I was fascinated by the pattern on the breast. I never would have noticed or remembered this detail from just looking at the bird with my binoculars. Since then, experiences like this have been repeated many times.

Common Merganser (male)


")

